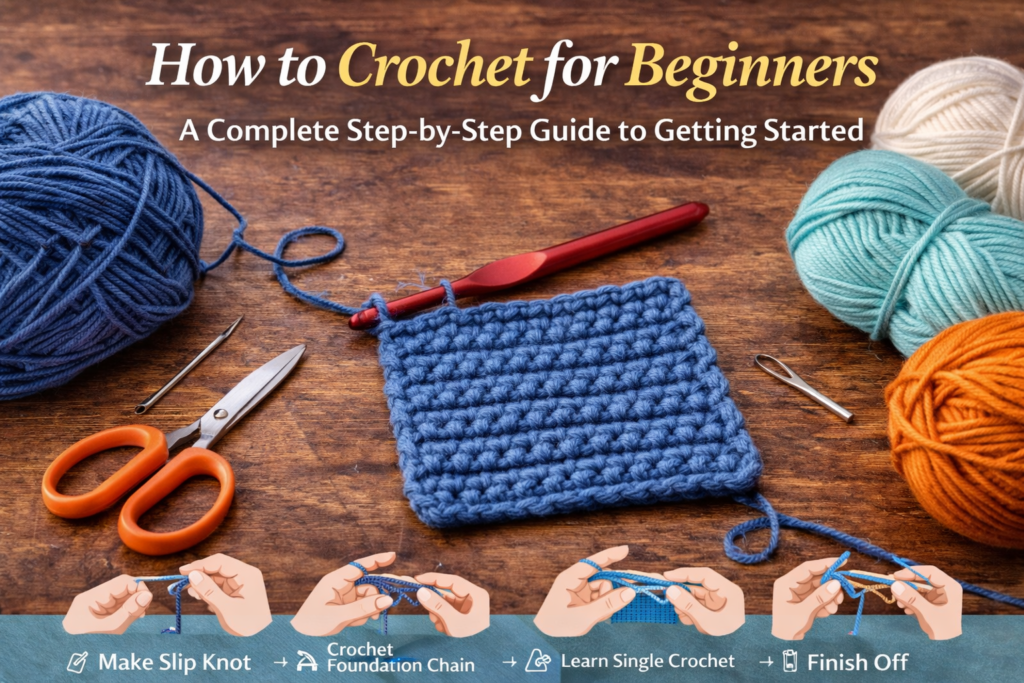
Crochet is one of the most relaxing and rewarding crafts you can learn. Whether you want to create cozy blankets, stylish scarves, or handmade gifts, crochet is a beginner-friendly skill that requires only a few basic tools.
If you’ve never held a crochet hook before, don’t worry. This complete beginner’s guide will walk you step by step through everything you need to know to start crocheting with confidence.
By the end of this guide, you’ll understand the basic stitches and be ready to start your first project.
What You Need to Start Crocheting
One of the best things about crochet is that it requires minimal supplies.
Here’s what you need:
- Crochet hook (size H-8 / 5mm is great for beginners)
- Medium-weight yarn (worsted weight yarn works best)
- Scissors
- Yarn needle (for weaving in ends)
That’s it. No machines, no complicated tools.
Step 1: Learn How to Hold the Crochet Hook
There are two common ways to hold a crochet hook:
- Pencil grip – hold it like a pencil.
- Knife grip – hold it like a knife.
Choose whichever feels more comfortable. Comfort matters more than technique at this stage.
Step 2: Make a Slip Knot
The slip knot is the first loop on your hook.
- Create a loop with your yarn.
- Pull the working yarn through the loop.
- Tighten gently around the hook.
Now you’re ready to start stitching.
Step 3: Make a Foundation Chain
The foundation chain is the base of most crochet projects.
- Yarn over (wrap yarn over the hook).
- Pull through the loop on your hook.
- Repeat until you reach your desired length.
For practice, try making a chain of 15–20 stitches.
Tip: Keep your stitches loose enough so the chain isn’t too tight.
Step 4: Learn the Single Crochet Stitch
The single crochet (SC) is the most basic and important stitch.
- Insert hook into the second chain from the hook.
- Yarn over.
- Pull up a loop (you now have two loops on the hook).
- Yarn over again.
- Pull through both loops.
Repeat across the row.
You’ve just completed your first row of crochet.
Step 5: Turn Your Work
At the end of each row:
- Chain one.
- Turn your work.
- Begin stitching into the first stitch of the new row.
This creates even rows and builds your fabric.
Step 6: Practice Consistency
Continue making rows of single crochet.
Focus on:
- Keeping tension consistent
- Counting stitches
- Maintaining even edges
After 10–15 rows, you’ll notice improvement.
Step 7: Finish Off Your Work
When ready to finish:
- Cut the yarn, leaving about 6 inches.
- Pull the yarn through the final loop.
- Tighten gently.
- Use a yarn needle to weave in the ends.
Congratulations — you’ve completed your first crochet swatch.
Common Beginner Crochet Mistakes
Avoid these common errors:
- Pulling yarn too tight
- Skipping stitches accidentally
- Not counting stitches each row
- Using very dark yarn when learning (harder to see stitches)
Learning crochet takes patience, but mistakes are part of the process.
Easy First Crochet Projects for Beginners
Once comfortable with single crochet, try:
- Simple dishcloth
- Basic scarf
- Small coaster
- Granny square
Start small before moving to larger projects like blankets or sweaters.
Final Thoughts
Crochet is more than just a craft — it’s a creative outlet that reduces stress and builds confidence. With just a hook and yarn, you can create something beautiful and handmade.
Remember, every expert crocheter was once a beginner. Keep practicing, stay patient, and enjoy the journey.