If you’ve always wanted to start quilting but felt overwhelmed by the process, you’re not alone. Many beginners hesitate because quilting seems complicated. The truth is, making your first quilt is much simpler than it looks — when you follow a clear step-by-step method.
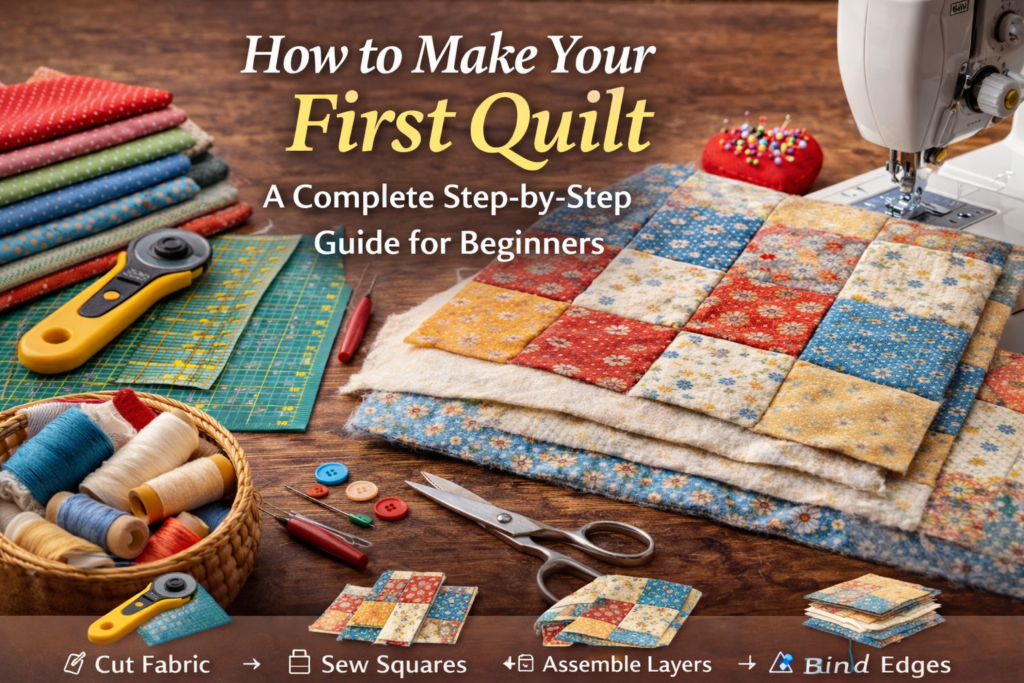
In this complete beginner’s guide, you will learn exactly how to make your first quilt from start to finish, including materials, cutting, piecing, assembling, and finishing techniques.
By the end of this guide, you’ll feel confident enough to begin your quilting journey.
What You Need Before You Start
Before beginning, gather these essential quilting supplies:
- 100% cotton fabric (at least 3 different prints)
- Rotary cutter
- Self-healing cutting mat
- Quilting ruler
- Sewing machine (or hand sewing needle)
- Cotton thread
- Quilt batting
- Backing fabric
- Pins or clips
- Iron and ironing board
Having everything ready makes the process smoother and more enjoyable.
Step 1: Choose a Simple Quilt Pattern
As a beginner, avoid complex block designs. A basic patchwork quilt made from squares is perfect for your first project.
A common beginner layout:
- 5×5 grid of fabric squares
- Each square measuring 5” x 5”
This creates a small lap quilt that is manageable and beginner-friendly.
Step 2: Cut Your Fabric Accurately
Accurate cutting is essential for a clean result.
- Press your fabric first.
- Use your quilting ruler and rotary cutter.
- Cut 25 squares measuring 5” x 5”.
- Keep edges straight and consistent.
Tip: Double-check measurements before cutting multiple layers.
Step 3: Sew the Squares into Rows
Now it’s time to sew.
- Place two squares right sides together.
- Sew with a ¼ inch seam allowance.
- Add the next square to create a row of five.
- Repeat until you have five rows.
Press seams open or to one side using an iron.
Step 4: Join the Rows Together
Once all rows are complete:
- Align seams carefully.
- Pin intersections for accuracy.
- Sew rows together one at a time.
- Press again.
You now have your quilt top finished.
Step 5: Create the Quilt Sandwich
A quilt is made of three layers:
- Quilt top
- Batting (middle layer)
- Backing fabric
Lay the backing fabric flat (right side down), place batting on top, and then the quilt top (right side up).
Smooth out wrinkles and secure with pins or clips.
Step 6: Quilt the Layers Together
For beginners, straight-line quilting is the easiest method.
You can sew:
- Along the seams (“stitch in the ditch”)
- Or in straight lines across the quilt
Take your time and sew slowly.
Step 7: Trim and Bind the Edges
After quilting:
- Trim excess batting and backing.
- Prepare binding strips (2.5 inches wide).
- Sew binding around the edges.
- Fold over and stitch to finish.
This step gives your quilt a clean, professional look.
Common Beginner Mistakes to Avoid
- Skipping pressing steps
- Using inconsistent seam allowance
- Choosing stretchy fabric
- Rushing through cutting
Patience is key in quilting.
Final Thoughts
Making your first quilt is a rewarding experience. It may not be perfect — and that’s completely okay. Every experienced quilter started exactly where you are now.
Focus on learning the basics, enjoy the process, and celebrate finishing your first project.
Quilting is not about perfection. It’s about creativity, patience, and creating something meaningful with your own hands.