Engaging Introduction
If you’ve ever wanted to create something both adorable and practical with your crochet skills, this Crocheted Shoe – Pattern is the perfect project to begin with. Crocheting baby shoes is one of the most rewarding experiences in this craft—it combines precision, creativity, and the joy of making something meaningful with your own hands.
In this detailed guide, I will walk you through every step as if I were teaching you in person. This project is designed for beginners, but even those with some experience will find valuable techniques and tips throughout the process.
By the end of this tutorial, you will not only have completed a beautiful crocheted shoe, but you will also understand how to shape small crochet items, adjust sizing, and achieve a clean, professional finish.
I have personally made variations of this pattern many times for gifts, and it remains one of the most appreciated handmade items due to its charm and functionality.
Materials Needed (Detailed)
Before starting, gather all your materials to ensure a smooth workflow.
Yarn
- Type: Soft cotton or acrylic yarn (baby-friendly)
- Weight: Lightweight (Category 3 – DK)
- Amount: Approximately 50–80 grams per pair
Tip: Choose yarn that is soft, breathable, and safe for sensitive skin.
Crochet Hook
- Size: 3.5 mm (E-4)
If your stitches are tight, consider using a 4.0 mm hook for better flexibility.
Additional Tools
- Scissors
- Yarn needle (for weaving ends)
- Stitch markers
- Measuring tape
- Small buttons (optional for decoration)
Abbreviations and Terms
Understanding crochet terminology is essential, especially for beginners.
- ch = chain
- sc = single crochet
- hdc = half double crochet
- dc = double crochet
- sl st = slip stitch
- st = stitch
- rep = repeat
Beginner-Friendly Explanation
- Chain (ch): The starting foundation
- Single Crochet (sc): Tight and compact stitch
- Half Double Crochet (hdc): Medium height stitch
- Double Crochet (dc): Taller, more flexible stitch
- Slip Stitch (sl st): Used to join or finish rounds
Take a moment to practice these stitches if you’re unfamiliar with them.
Gauge and Size Information
Gauge
- 16 stitches x 10 rows = 10 x 10 cm in half double crochet
Finished Size
- Newborn: 9 cm (3.5 inches) sole length
Adjusting Size
To make larger shoes:
- Use a thicker yarn
- Increase hook size
- Add extra stitches in the sole rounds
To make smaller shoes:
- Use thinner yarn
- Reduce stitch count
Tip: Always test your gauge before starting.
Step-by-Step Instructions (Very Detailed)
Let’s begin constructing the crocheted shoe step by step.
Step 1: Sole Foundation
- Start with a slip knot
- Chain 10 stitches
Tip: Keep your chain loose to avoid curling.
Step 2: First Round (Sole Base)
- In the 2nd chain from hook, make 2 sc
- Make 1 sc in next 7 chains
- In last chain, make 5 sc
- Continue on the opposite side:
- 1 sc in next 7 stitches
- In last stitch, make 3 sc
- Join with sl st
You now have an oval shape forming the base.
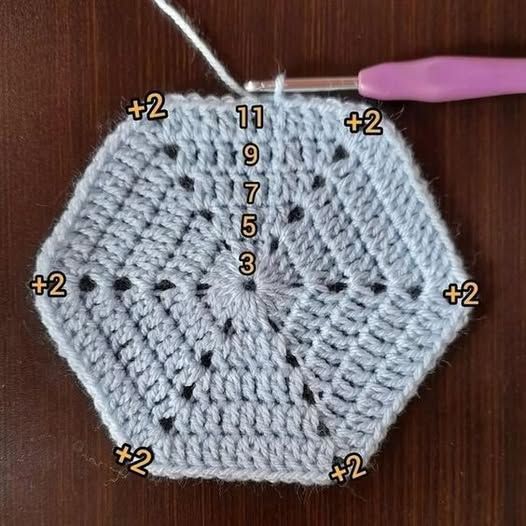
Step 3: Second Round (Expanding Sole)
- Chain 1
- 2 sc in first stitch
- 1 sc in next stitches
- Increase at both ends (2 sc in same stitch)
- Continue evenly around
- Join with sl st
Tip: Place markers at the toe and heel increases.
Step 4: Third Round (Final Sole Shape)
- Chain 1
- Work sc around
- Add increases only at toe and heel
- Join with sl st
Your sole should now look smooth and symmetrical.
Step 5: Building the Shoe Walls
- Chain 1
- Work 1 sc in the back loop only around
- Join with sl st
This creates a natural fold that forms the sides.
Step 6: Upper Shoe Structure
- Chain 1
- Work sc around for 2–3 rounds
- Do not increase
Tip: This builds height and structure.
Step 7: Shaping the Toe
- Count the front center stitches
- Work sc decreases (sc2tog) across the toe area
- Continue around normally for the rest
Repeat for 2 rounds.
This step gives the shoe its curved front.
Step 8: Creating the Opening
- Stop working in full rounds
- Work back and forth in rows
- Create a small opening for the foot
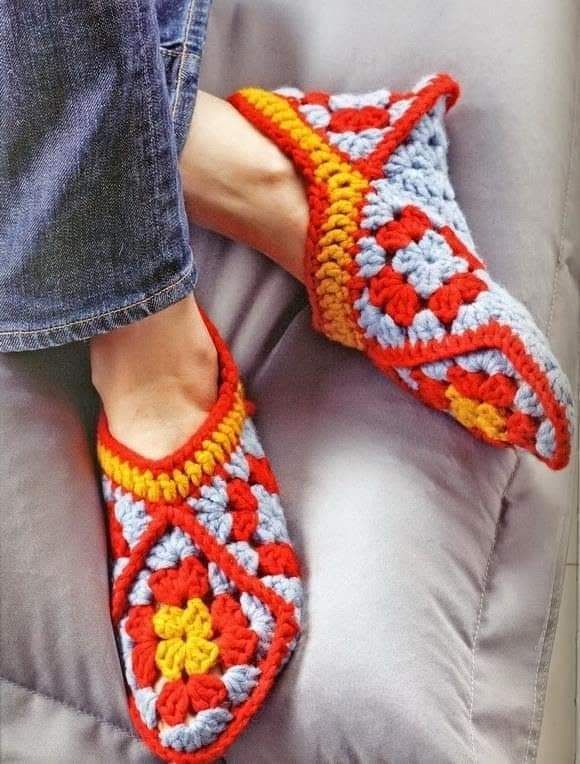
Step 9: Strap (Optional)
- Attach yarn at the side
- Chain 12–15
- Slip stitch back
- Attach to opposite side
Optional: Add a button for closure.
Tips for Beginners
Maintain Even Tension
Consistency is key for a neat finish.
Use Stitch Markers
They help track rounds and prevent mistakes.
Practice Decreases
Toe shaping depends on clean decreases.
Take Your Time
Precision matters more than speed.
Common Errors and Fixes
Uneven Sole
Cause: incorrect stitch count
Fix: recount each round carefully
Shoe Too Tight
Cause: tight tension
Fix: use larger hook
Shoe Too Loose
Cause: loose tension
Fix: use smaller hook
Customization Ideas
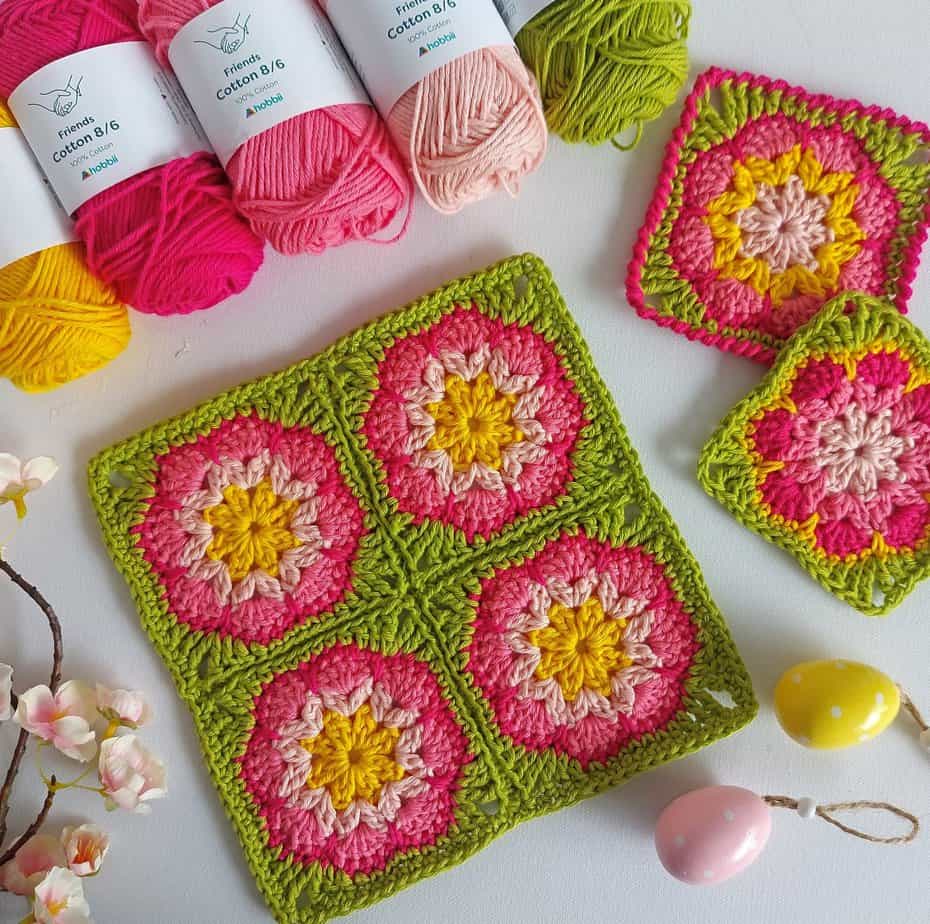
Color Variations
- Pastel tones for babies
- Neutral colors for modern look
- Bright colors for playful designs
Creative Additions
- Small bows
- Buttons
- Embroidery details
Size Adjustments
- Add rounds to the sole
- Adjust height of upper
Finishing Instructions
Weaving Ends
Use a yarn needle to hide all loose ends securely.
Shaping the Shoe
Lightly shape with your hands to define structure.
Optional Blocking
- Lightly dampen
- Shape
- Let dry
Conclusion
This Crocheted Shoe – Pattern is more than just a beginner project—it’s a foundation for learning how to create structured crochet items with confidence and precision.
By following this step-by-step guide, you’ve not only created a charming handmade item but also developed essential crochet skills that will help you in future projects.
I encourage you to experiment with colors, textures, and sizes. With practice, you’ll be able to design your own variations and even create matching sets.
Crochet is a journey built one stitch at a time, and this project is an excellent step forward in that journey.