Learn a complete crochet caterpillar pattern with step-by-step instructions, tips, and beginner-friendly guidance.
If you are looking for a fun, colorful, and beginner-friendly project, this crochet caterpillar pattern is the perfect choice. Amigurumi projects like this are not only adorable but also incredibly useful for learning essential crochet techniques such as working in rounds, shaping, and assembling small pieces.
In this complete guide, I will teach you how to create a caterpillar amigurumi crochet free pattern from scratch, using simple stitches and clear instructions. This tutorial is designed especially for beginners, but it also includes professional tips that will help you improve your finishing and shaping skills. By the end, you will have a soft, well-structured caterpillar that can be used as a toy, decoration, or gift.
Materials Needed for Crochet Caterpillar Pattern
Before starting your crochet caterpillar pattern, it is essential to gather all materials to ensure a smooth process.
- Yarn: Cotton or acrylic (DK or Worsted weight)
- Colors: Green (main body), plus optional colors for segments
- Hook: 3.5 mm or 4.0 mm
- Stuffing: Polyester fiberfill
- Safety eyes or black yarn
- Yarn needle
- Stitch marker
- Scissors
Tip: Use soft yarn for a plush and friendly look.
Abbreviations and Basic Terms
To follow this crochet caterpillar pattern, you need to understand these basic terms:
- MR = Magic Ring
- sc = single crochet
- inc = increase (2 sc in same stitch)
- dec = decrease (sc2tog)
- sl st = slip stitch
- st = stitch
If you are a beginner, take time to practice these stitches before starting.
Understanding Shape and Structure in Crochet Caterpillar Pattern
A caterpillar is made of multiple round segments. Each segment is created separately and then joined together.
The key to a good result is maintaining consistent tension and evenly stuffing each section. This ensures your caterpillar looks symmetrical and professional.
Crochet Caterpillar Pattern: Creating the First Body Segment
Explanation
The first segment is the foundation of your caterpillar. It determines the size and shape of the entire project. Working in continuous rounds helps create a seamless look.
Take your time in this step. Beginners often rush the first segment, but this is where accuracy matters most.
Steps:
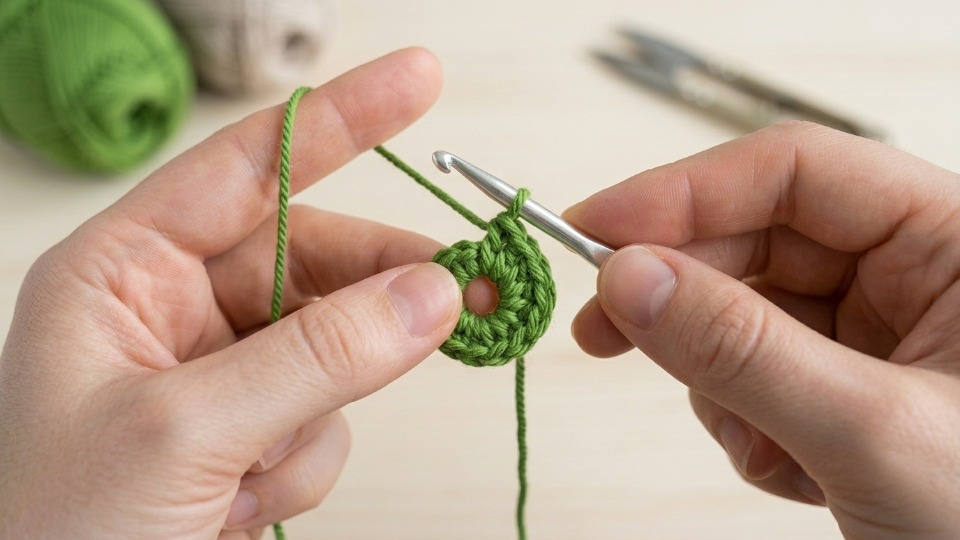
Passo 1: Create a magic ring and crochet 6 sc inside
Passo 2: Increase in each stitch (12 sts)
Passo 3: Continue increasing until you reach 24 stitches
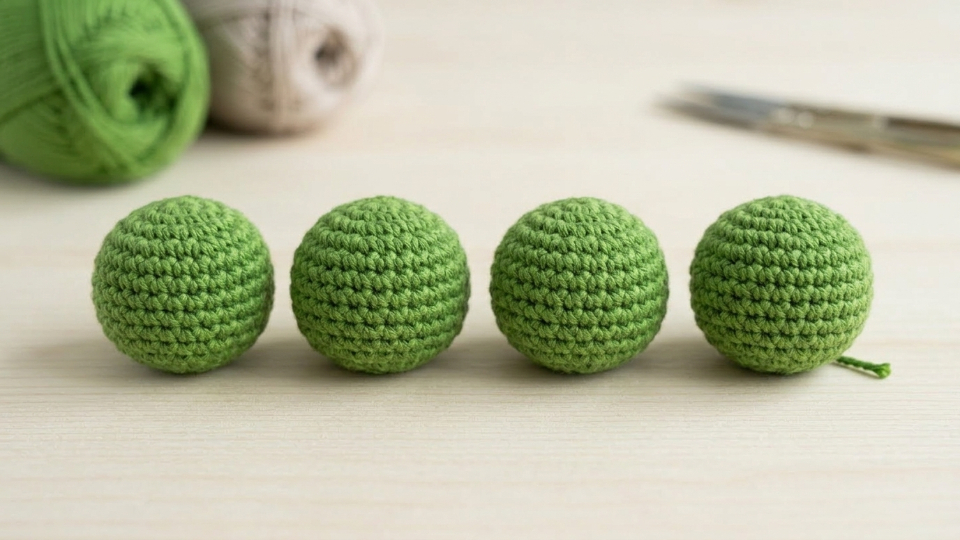
Crochet Caterpillar Pattern: Building Additional Segments
Explanation
Each segment follows a similar pattern, but consistency is key. This repetition helps beginners gain confidence while maintaining uniform size.
Make at least 5 to 7 segments depending on the desired length of your caterpillar.
Steps:
Passo 1: Repeat the same pattern used in the first segment
Passo 2: Stop increasing once the desired size is reached
Passo 3: Fasten off, leaving a long tail for sewing
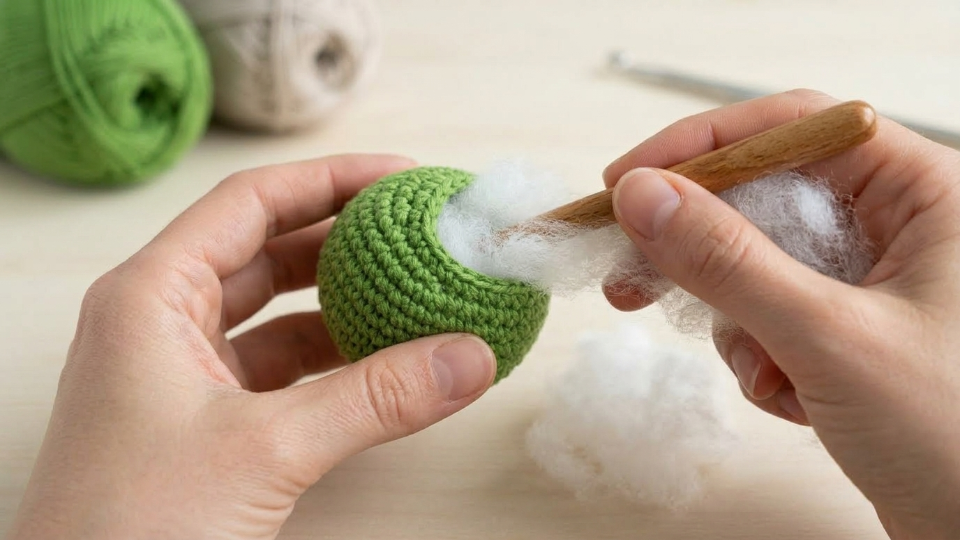
Crochet Caterpillar Pattern: Stuffing and Shaping
Explanation
Stuffing is what brings your caterpillar to life. Too little stuffing makes it floppy, while too much distorts the shape.
Add stuffing gradually to each segment and shape it with your fingers.
Steps:
Passo 1: Insert small amounts of stuffing
Passo 2: Shape each segment evenly
Passo 3: Avoid overstuffing
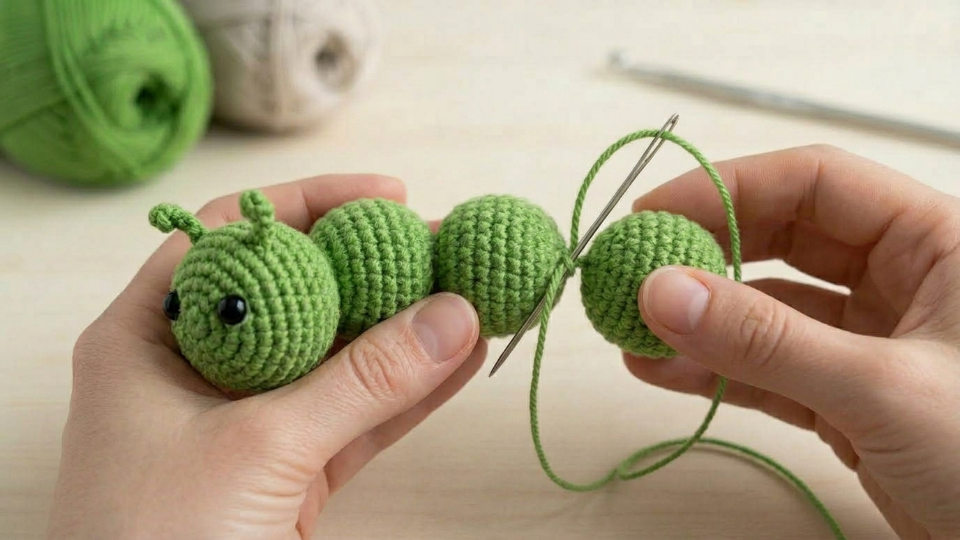
Crochet Caterpillar Pattern: Joining the Segments
Explanation
This is where your project starts to look like a caterpillar. Proper alignment is essential to keep the body straight.
Use the yarn tail from each segment to sew them together securely.
Steps:
Passo 1: Align segments in a straight line
Passo 2: Sew using a yarn needle
Passo 3: Secure tightly but neatly
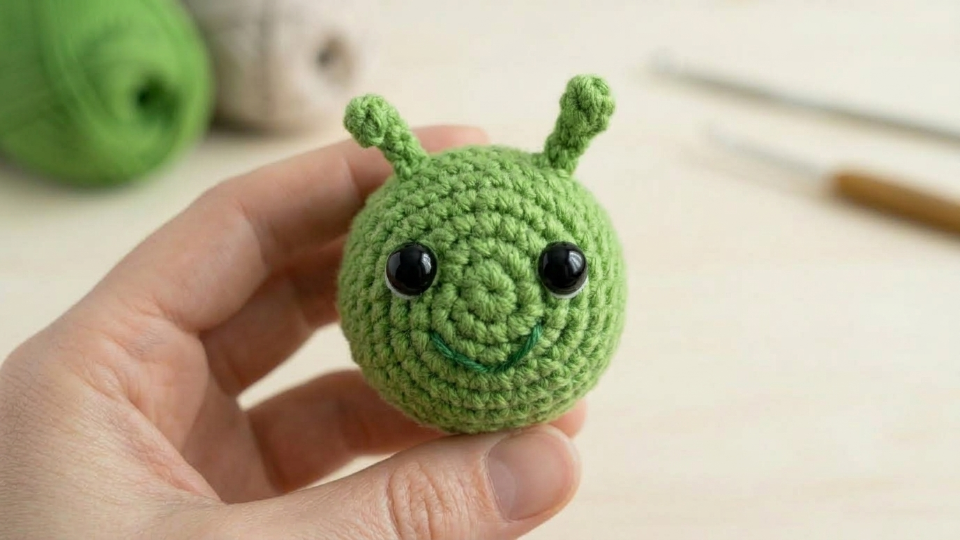
Crochet Caterpillar Pattern: Adding Face and Details
Explanation
The face gives personality to your caterpillar. Small details make a big difference.
You can use safety eyes or embroider them.
Steps:
Passo 1: Attach safety eyes
Passo 2: Embroider a small smile
Passo 3: Add antennae if desired
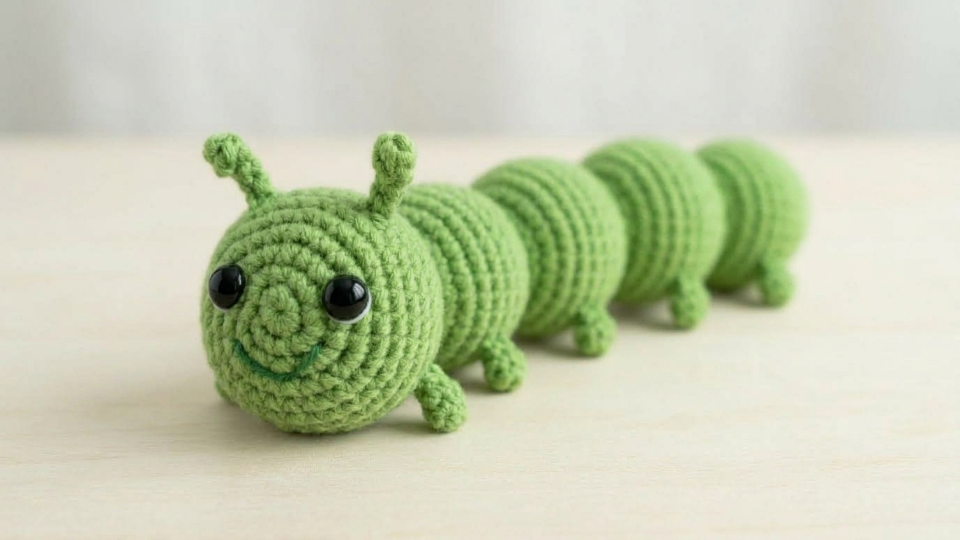
Crochet Caterpillar Pattern: Final Assembly and Adjustments
Explanation
This final step ensures your caterpillar looks polished and balanced. Small adjustments can significantly improve the final result.
Check alignment, tighten loose stitches, and refine the shape.
Steps:
Passo 1: Inspect all seams
Passo 2: Adjust stuffing if needed
Passo 3: Trim and hide yarn ends
Conclusion
Creating your own crochet caterpillar pattern is a rewarding experience that helps build confidence and develop essential crochet skills. From shaping segments to assembling the final piece, each step teaches something valuable that you can apply to future amigurumi projects.
As you continue practicing, you will notice improvements in your tension, stitching consistency, and finishing techniques. This caterpillar is just the beginning of your journey into the creative world of crochet.
If you want to take your crochet to the next level, try experimenting with different yarn textures, colors, and segment sizes. Small changes can turn a simple crochet caterpillar pattern into a unique and personalized creation.