Engaging Introduction
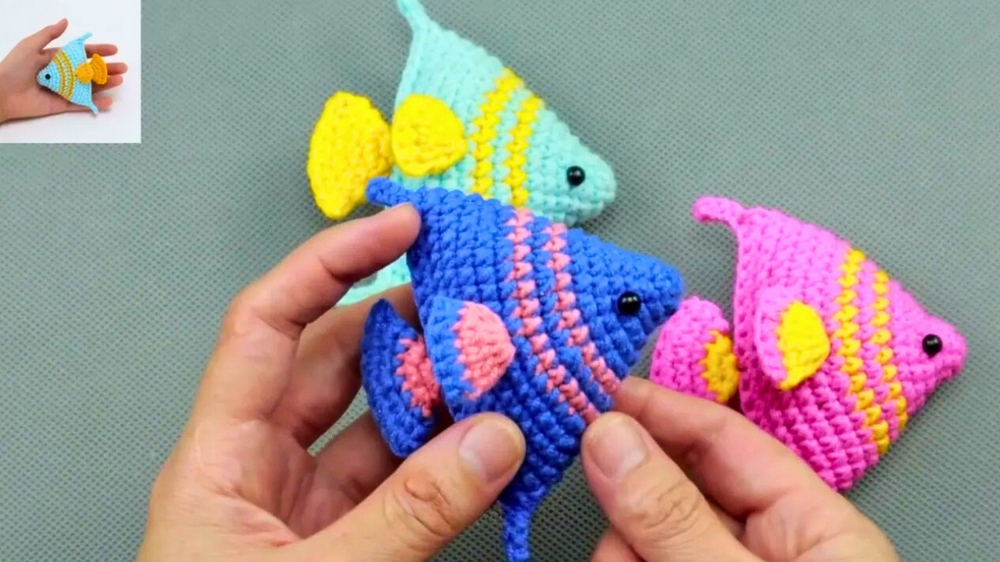
If you are looking for a fun, creative, and beginner-friendly project, this Crochet Sea Fish Pattern is the perfect choice. Crocheting small sea creatures is one of the most enjoyable ways to develop your skills, and fish patterns are especially popular because they are versatile, quick to make, and incredibly charming .
In this tutorial, I will guide you step by step, just like a real crochet instructor would. You will learn how to create a soft, well-shaped amigurumi fish from scratch, including how to build the body, shape the tail, and add finishing details.
This project is ideal for beginners, but it also includes professional tips that even intermediate crocheters will appreciate.
I have personally used variations of this pattern for gifts and small decorative items, and it consistently delivers beautiful results with minimal complexity.
Materials Needed (Detailed)
Before we begin, let’s prepare everything properly. Having the right materials ensures a smooth and enjoyable experience.
Yarn
- Type: Cotton or acrylic yarn (soft and durable)
- Weight: Light to medium (DK or Worsted – Category 3 or 4)
- Colors:
- Main body color (e.g., blue, orange, or yellow)
- Secondary color for fins/tail
- Small amount of black or white for details
Tip: Using multiple colors creates a more realistic “sea life” effect, especially for fish scales and patterns.
Crochet Hook
- Size: 3.5 mm (E-4) for tighter stitches
- Alternative: 4.0 mm if you prefer softer texture
Additional Tools
- Scissors
- Yarn needle
- Stitch marker
- Polyester fiberfill (stuffing)
- Safety eyes (optional) or embroidery thread
Abbreviations and Terms
Understanding these terms will make everything easier:
- ch = chain
- sc = single crochet
- inc = increase (2 sc in same stitch)
- dec = decrease (sc2tog)
- sl st = slip stitch
- st = stitch
- rnd = round
Beginner Explanation
- Magic Ring: Used to start circular projects
- Increase: Expands the shape
- Decrease: Shapes and narrows the form
If you are new, take a moment to practice these before continuing.
Gauge and Size Information
Gauge
- 16 stitches x 10 rounds = 10 cm
Finished Size
- Approximately 10–15 cm (4–6 inches)
Adjusting Size
To make a larger fish:
- Use thicker yarn
- Increase hook size
- Add more increase rounds
To make a smaller fish:
- Use thinner yarn
- Reduce stitch count
Step-by-Step Instructions (Very Detailed)
Now let’s begin building your crochet fish.
Step 1: Start with Magic Ring
- Create a magic ring
- Work 6 single crochet (sc) into the ring
- Pull tight
Tip: Keep stitches tight to avoid holes.
Step 2: Increase Rounds (Building the Body)
- Round 2: inc in each stitch (12 sts)
- Round 3: (1 sc, inc) repeat (18 sts)
- Round 4: (2 sc, inc) repeat (24 sts)
- Round 5: (3 sc, inc) repeat (30 sts)
You are now forming a rounded body.
Step 3: Body Length
- Work 5–7 rounds of sc (no increases)
- This builds the fish’s body length
Tip: This is where you can change colors for stripes.
Color transitions are commonly used in sea creature patterns to create visual texture .
Step 4: Begin Decreasing
- Round: (3 sc, dec) repeat
- Next: (2 sc, dec) repeat
- Next: (1 sc, dec) repeat
Start stuffing the fish before closing.
Step 5: Closing the Body
- Continue decreasing until small opening
- Finish with slip stitch
- Fasten off
Step 6: Tail Creation
- Attach yarn at the back
- Chain 10
- Work back with:
- sc
- hdc
- dc
- Repeat for second side
This creates a soft, fan-shaped tail.
Step 7: Side Fins
- Attach yarn on side
- Chain 3
- Make 2 dc in same stitch
- Slip stitch
Repeat on the other side.
Step 8: Eyes and Details
Options:
- Safety eyes (insert before closing body)
- Embroidered eyes
- Small stitched mouth
Tip: Small details bring personality to your fish.
Tips for Beginners
Use Tight Stitches
Loose stitches cause stuffing to show.
Mark Your Rounds
Always track where each round begins.
Stuff Gradually
Don’t overstuff — it distorts shape.
Practice Decreases
Clean decreases make your project look professional.
Common Mistakes and Fixes
Fish Looks Flat
Cause: Not enough stuffing
Fix: Add more gradually
Holes Between Stitches
Cause: Loose tension
Fix: Use smaller hook
Shape Uneven
Cause: Missing stitches
Fix: Count every round
Customization Ideas
Color Variations
- Clownfish (orange + white + black)
- Blue ocean fish
- Rainbow fantasy fish
Texture Variations
- Add bobble stitches for scales
- Use striped yarn
Creative Additions
- Hanging loop (keychain)
- Baby toy
- Decorative piece
Fish patterns are extremely versatile and can be used as toys, decor, or gifts .
Finishing Instructions
Weaving Ends
Use a yarn needle and hide all ends securely.
Shaping
Gently shape with your hands after stuffing.
Final Touch
Check symmetry and adjust details.
Conclusion
This Crochet Sea Fish Pattern is a perfect introduction to amigurumi and a great way to build confidence in crochet. It combines simple stitches with shaping techniques that will help you grow as a crocheter.
From my own experience, projects like this are the foundation for more advanced creations. Once you master this fish, you’ll be ready to explore a whole world of sea creatures and creative designs.
Take your time, enjoy the process, and don’t worry about perfection. Every stitch you make is part of your progress.
Now that you understand the full process, you’re ready to create your own unique crochet fish — and maybe even a whole ocean collection.